Making a query
To view this content, get the Full package! 😃🙏
Or if you’ve already purchased.
Making a query
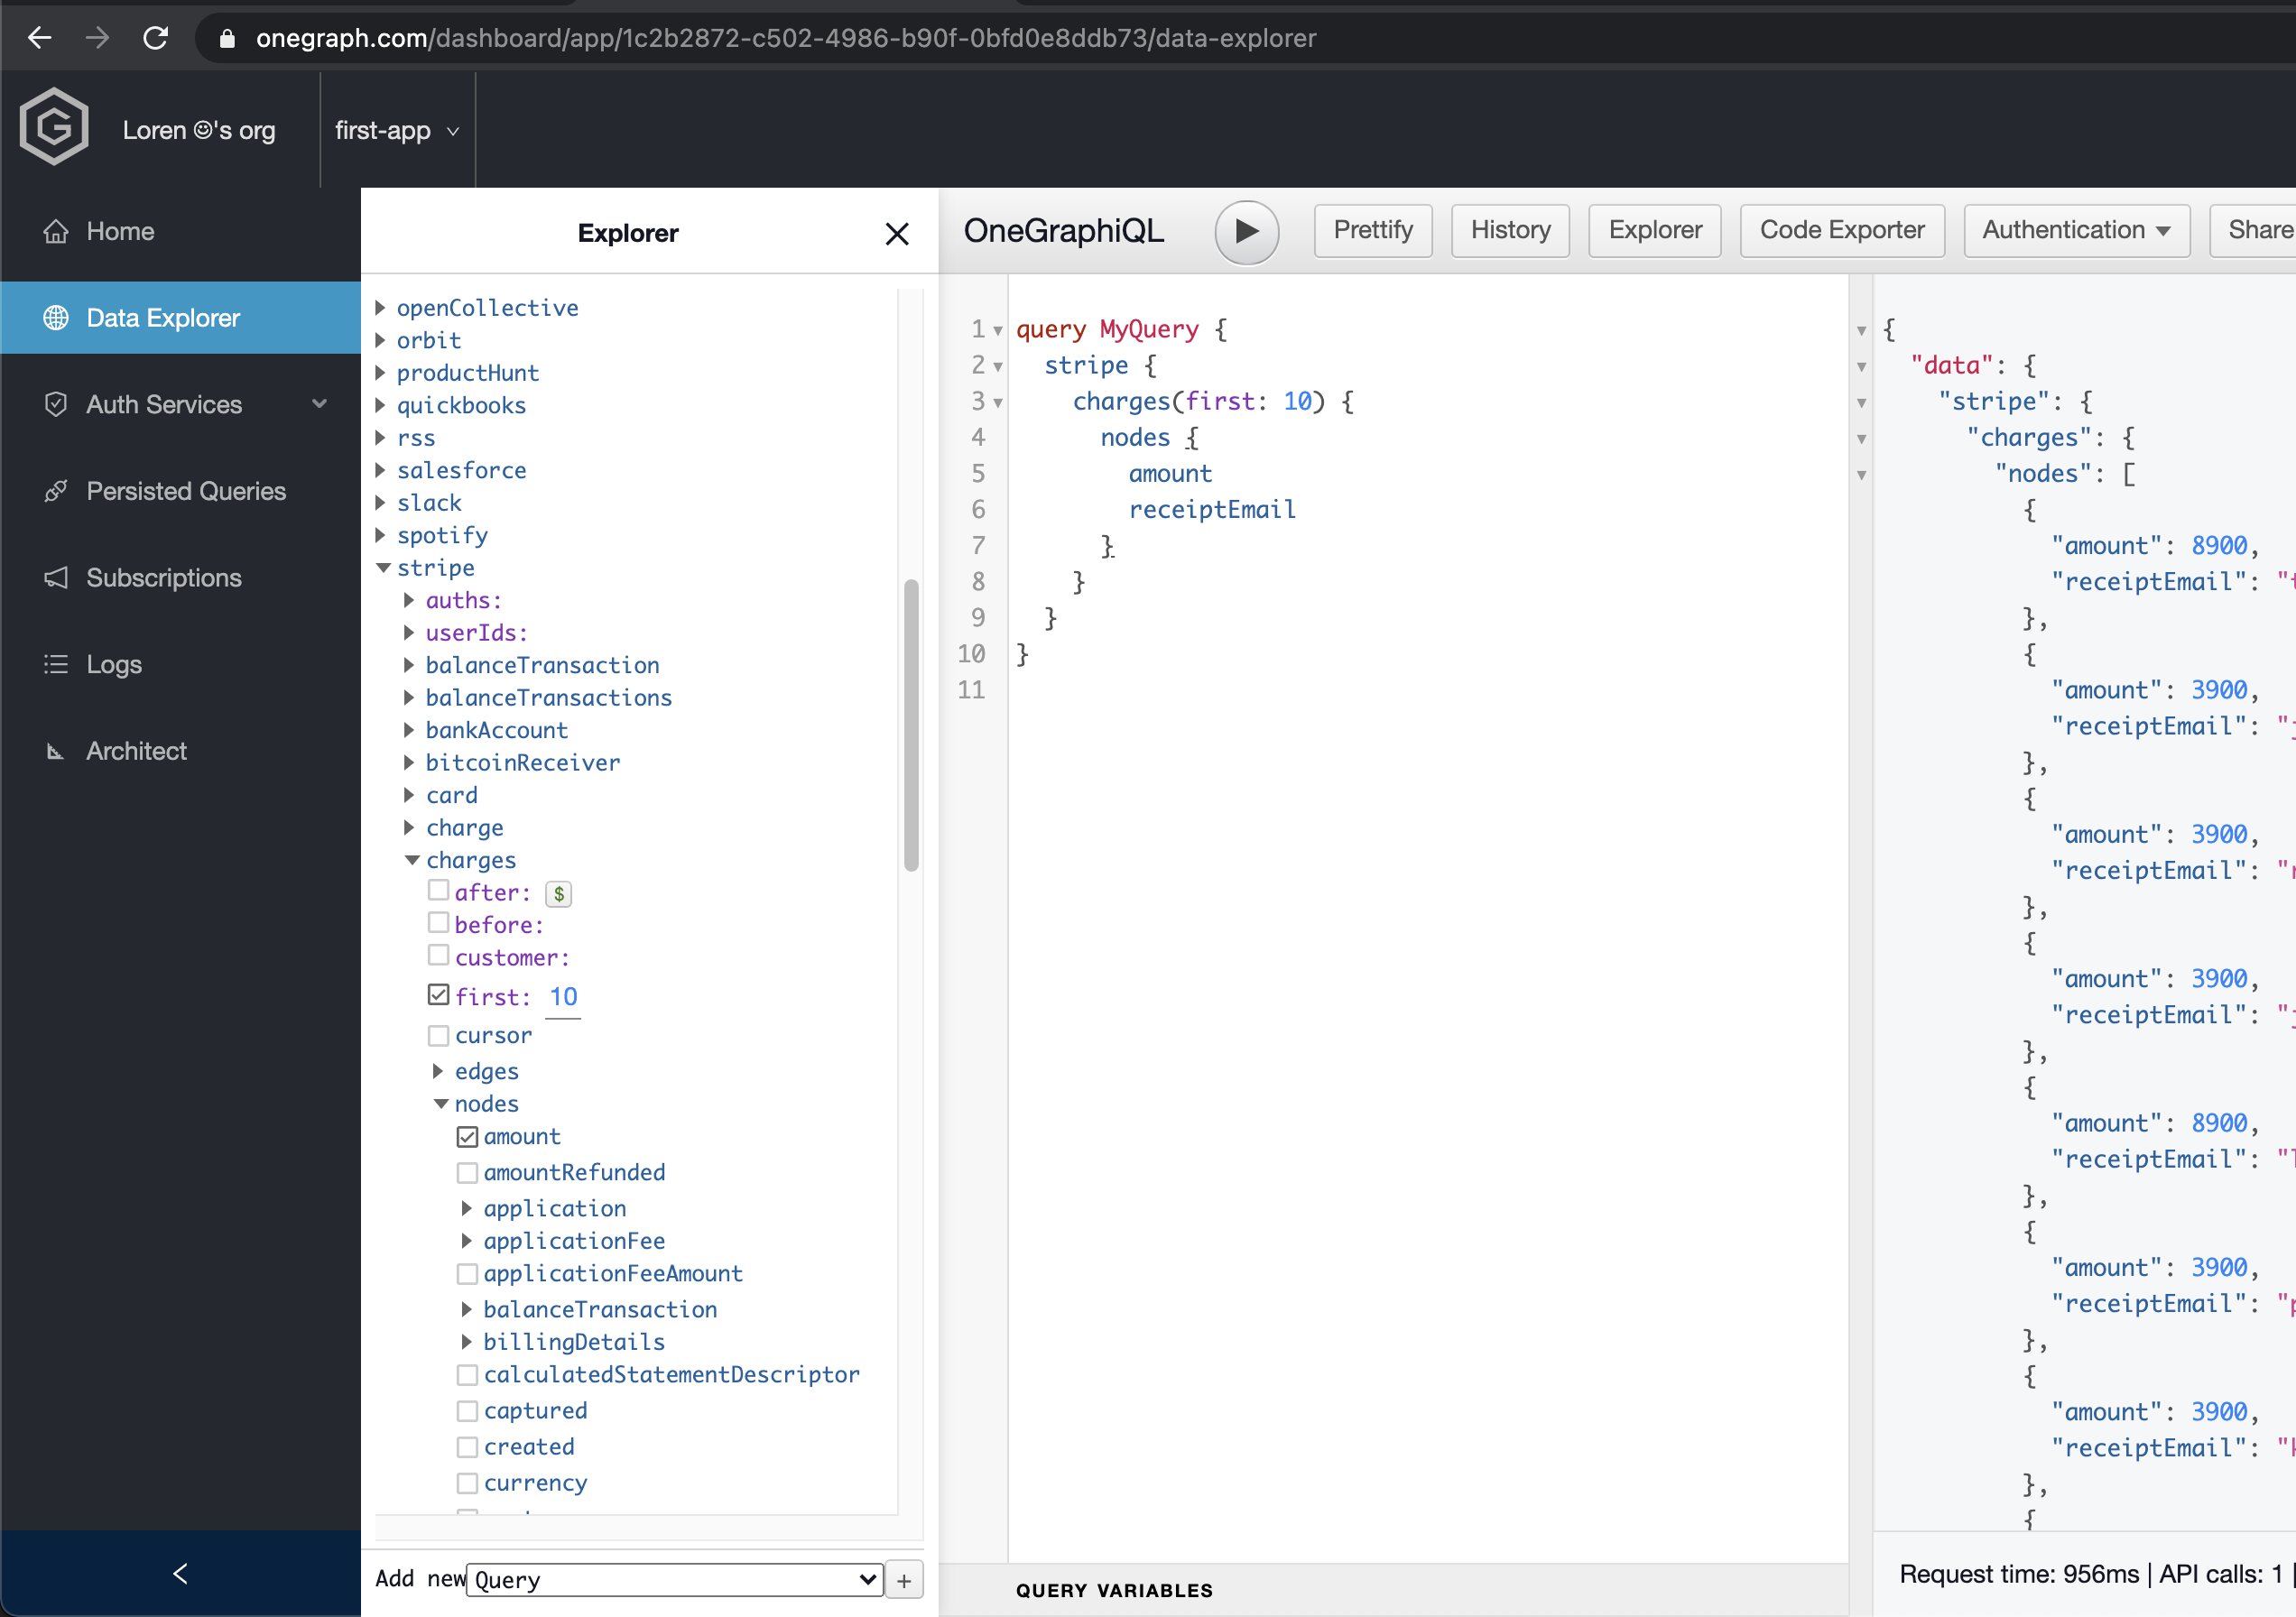
After signing up and creating an app in their dashboard, we can select “Data Explorer” on the left to see get a GraphiQL for our app’s API. Under the first Explorer column, we can see a root query field for each service that we can get data from. We can expand “stripe” to see what Stripe data we can fetch. Let’s select the most recent 10 charges and their amount and receiptEmail. The query is automatically written in the middle pane, and once we hit the “Authentication” button and go through Stripe OAuth, we can get the results on the right:

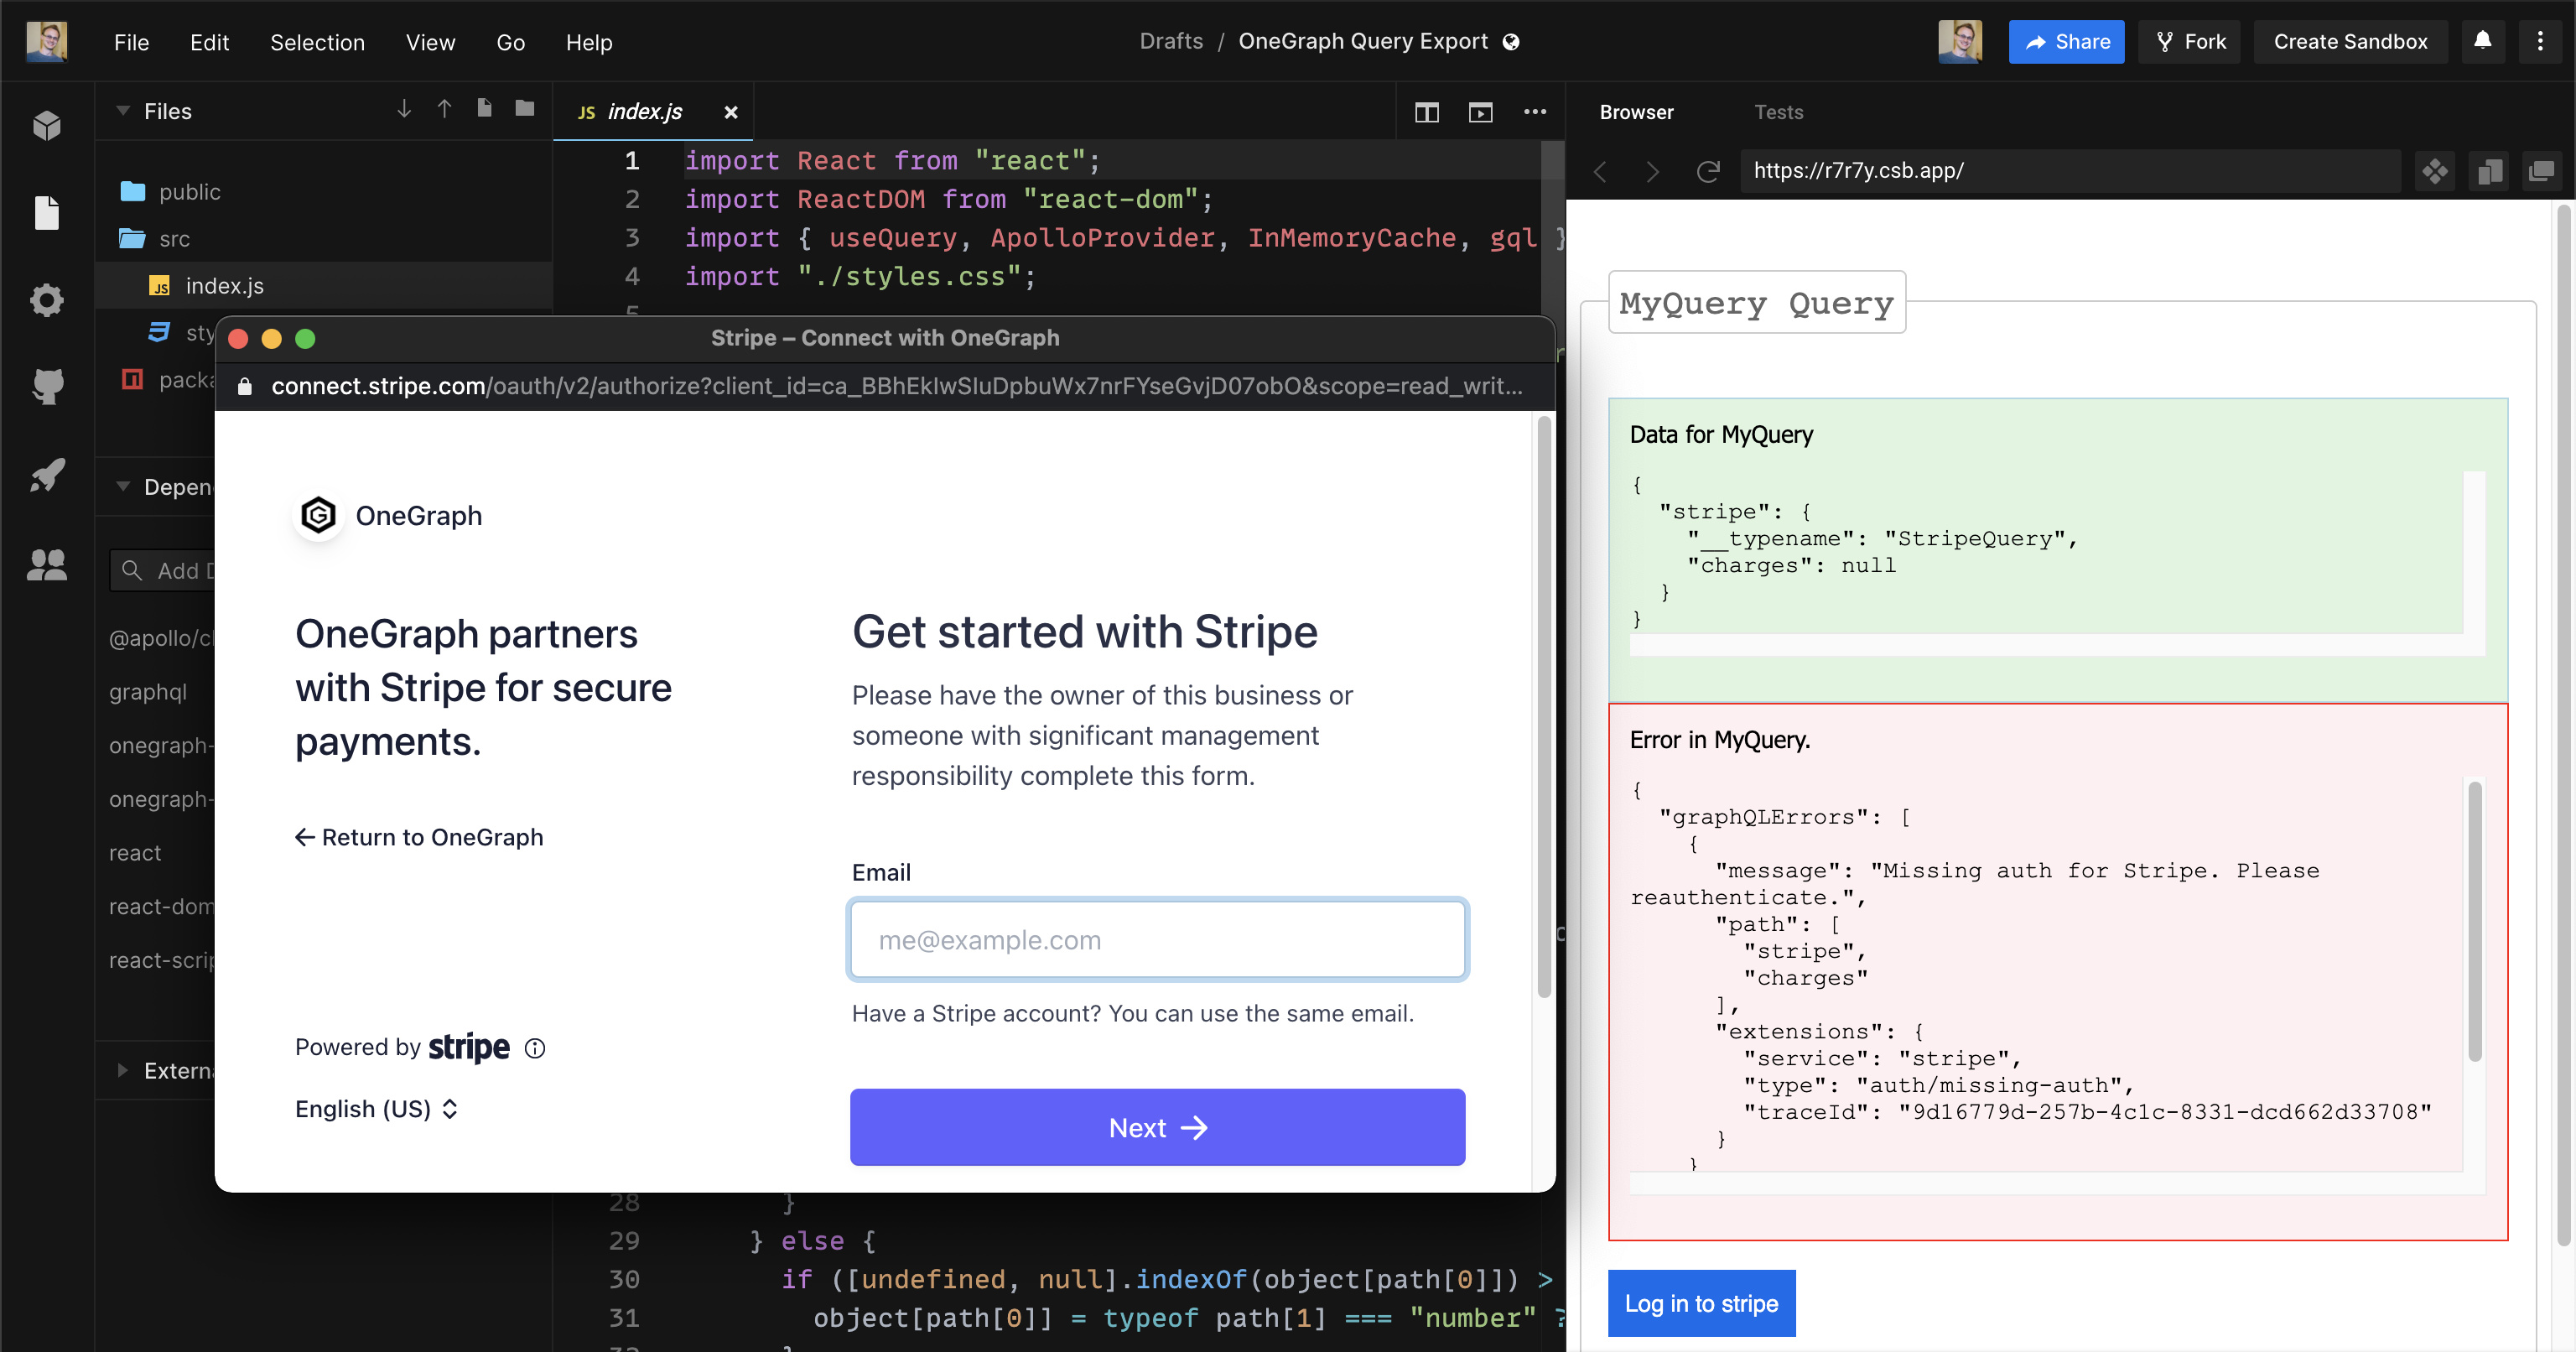
We can also generate code that runs this query. Let’s try clicking the “Code Exporter” button at the top, selecting “JavaScript”, “react-apollo”, and “Create CodeSandbox.” We’re taken to a CodeSandbox like this one, with the React and GraphQL code on the left backing the website on the right. To get our query working, we click the “Log in to stripe” button and complete the OAuth popup:

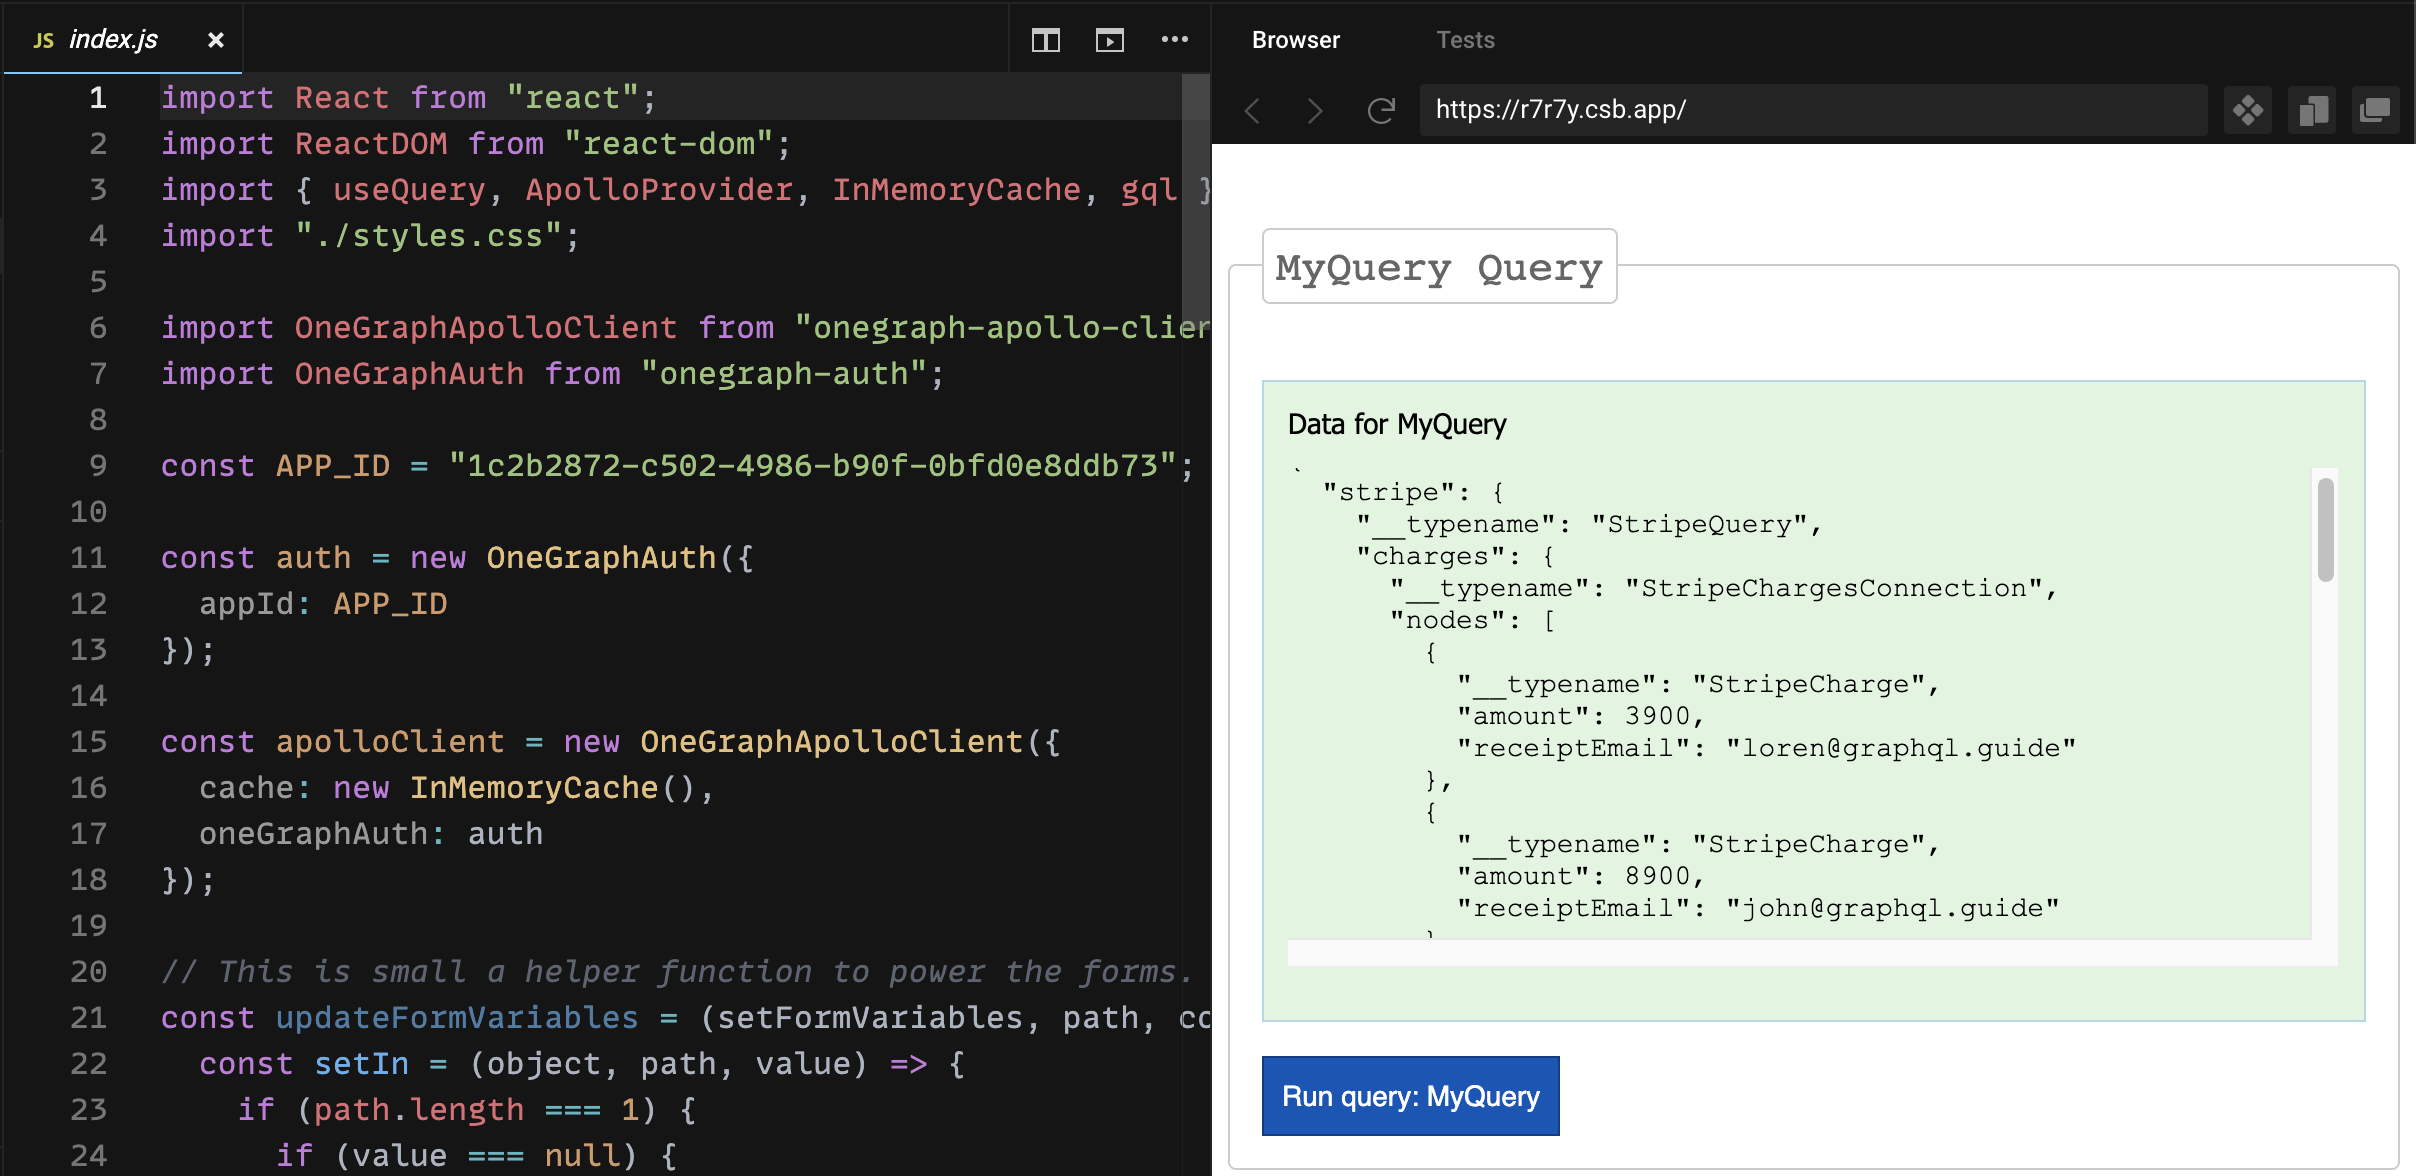
Now we see our data displayed:

Anyone else could use our app to look at the most recent charges in their Stripe account. The main parts of the generated code are:
import React from "react";
import ReactDOM from "react-dom";
import { useQuery, ApolloProvider, InMemoryCache, gql } from "@apollo/client";

import OneGraphApolloClient from "onegraph-apollo-client";
import OneGraphAuth from "onegraph-auth";

const auth = new OneGraphAuth({
  appId: APP_ID
});

const apolloClient = new OneGraphApolloClient({
  cache: new InMemoryCache(),
  oneGraphAuth: auth
});

const MY_QUERY = gql`
  query MyQuery {
    stripe {
      charges(first: 10) {
        nodes {
          amount
          receiptEmail
        }
      }
    }
  }
`;

const MyQuery = (props) => { ... }

const container = (
  <ApolloProvider client={apolloClient}>
    <MyQuery />
  </ApolloProvider>
);

ReactDOM.render(container, document.getElementById("root"));
It sets up an instance of OneGraph’s version of Apollo Client and uses MyQuery to fetch the data from our API.