Database hosting
How to set up hosted instances of MongoDB and Redis and connect to them
To view this content, buy the book! 😃🙏
Or if you’ve already purchased.
Database hosting
MongoDB hosting
If you’re jumping in here,
git checkout 26_0.2.0(tag 26_0.2.0, or compare 26...27)
Our last error is:
app[web.1]: (node:23) UnhandledPromiseRejectionWarning: MongoNetworkError: failed to connect to server [localhost:27017] on first connect [Error: connect ECONNREFUSED 127.0.0.1:27017The error is coming from MongoDB, which we’re setting up with:
const URL = 'mongodb://localhost:27017/guide'

export const connectToDB = async () => {
  const client = new MongoClient(URL, { useNewUrlParser: true })
  await client.connect()
  db = client.db()
  return client
}
In production, localhost is our Heroku container, which doesn’t have a MongoDB database server running on it. We need a place to host our database, and then we can use that URL instead of mongodb://localhost:27017/guide.
We have similar options to our Node deployment options: on-prem, IaaS, and DBaaS (similar to PaaS). Most people choose DBaaS because it requires the least amount of effort. With on-prem, we’d have to house the machines, and with IaaS, we’d have to configure and manage the OS and database software ourselves. MongoDB, Inc. runs their own DBaaS called Atlas.
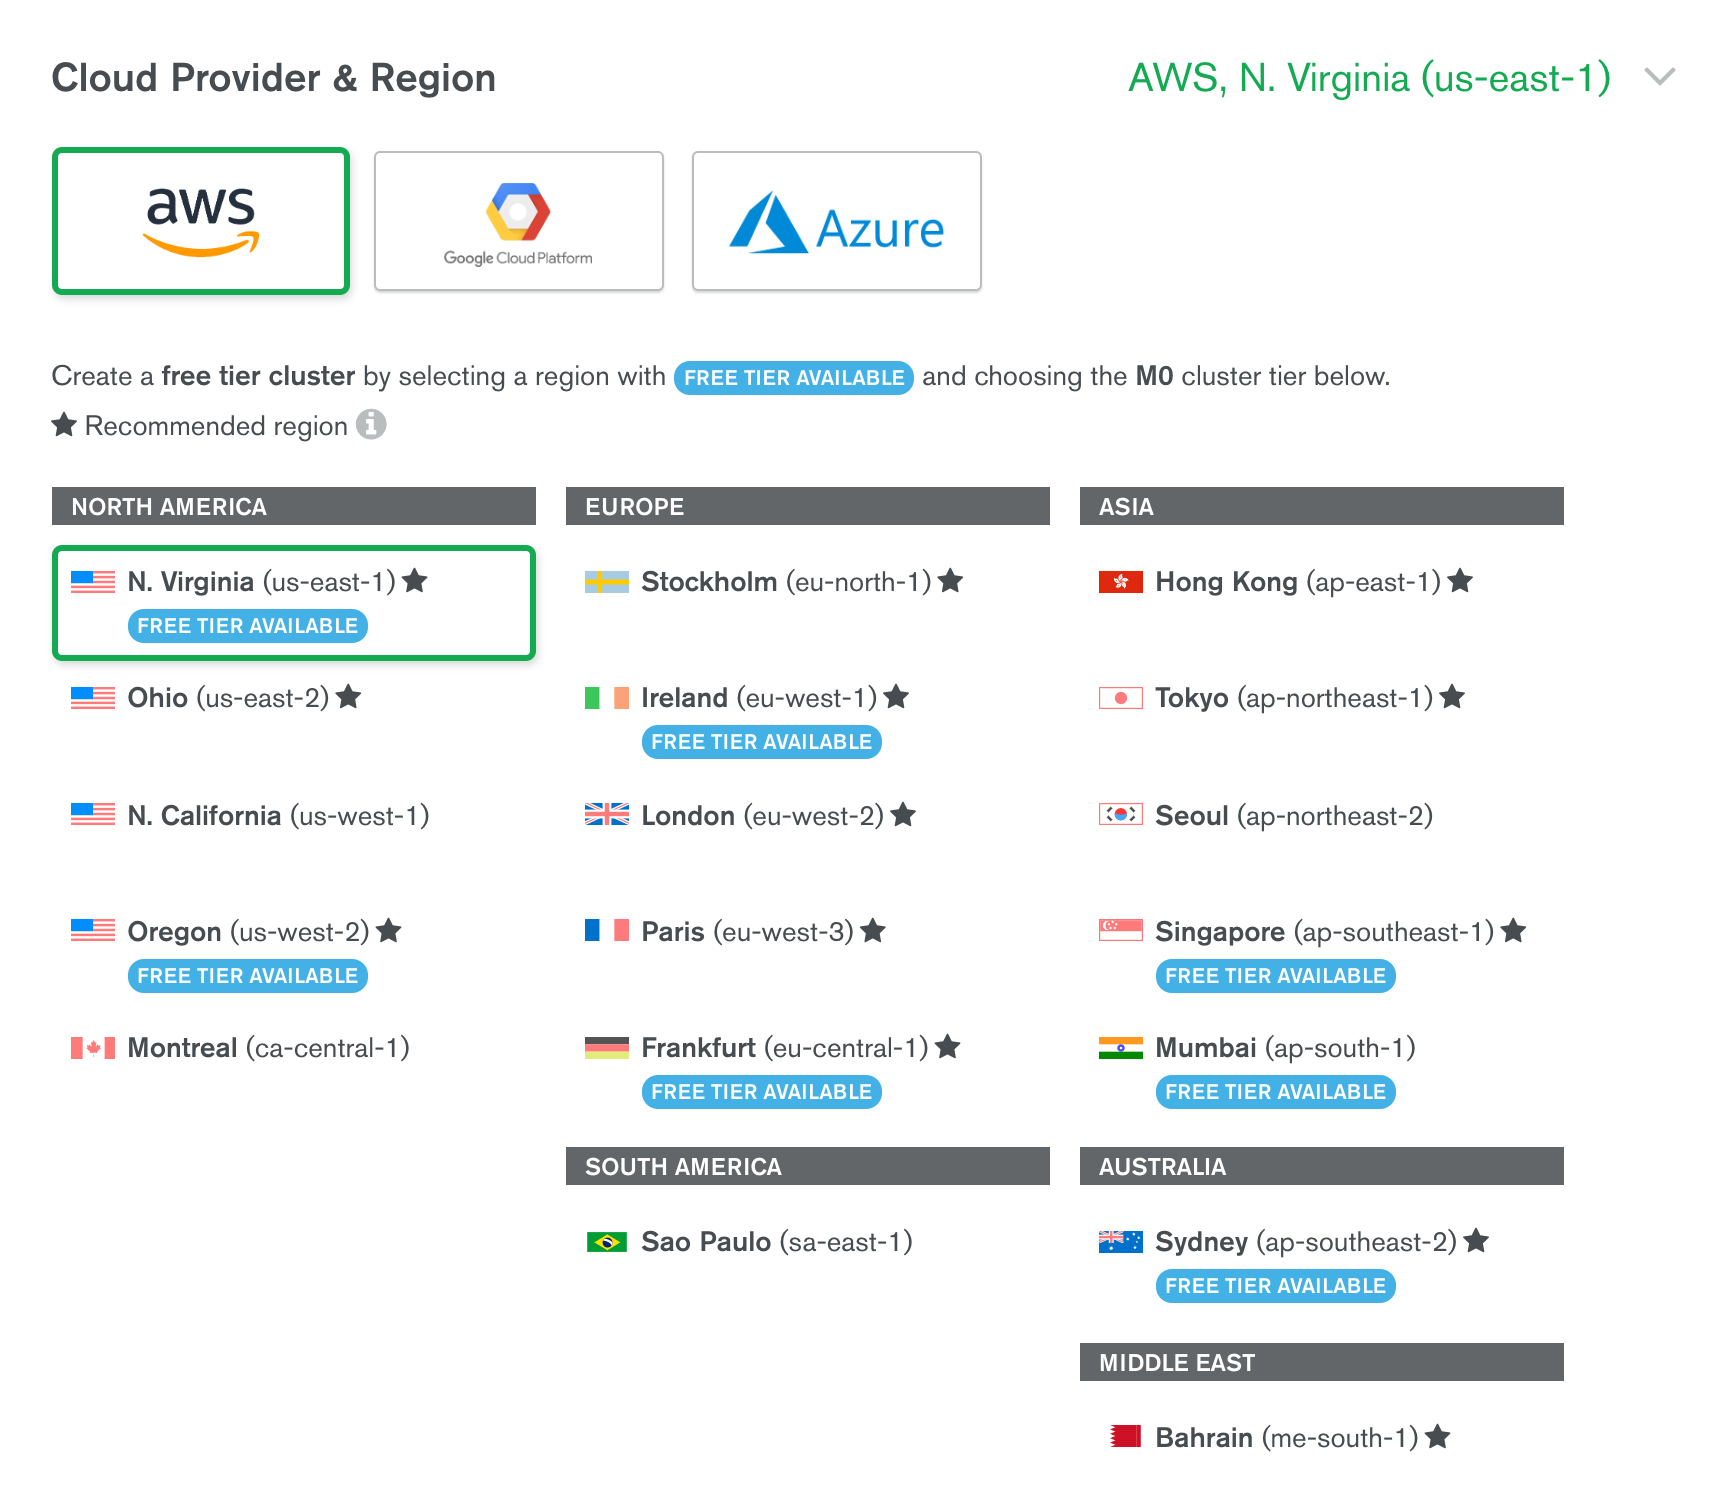
Let’s use the Atlas free plan to get a production MongoDB server. During setup, we have a choice of which cloud provider we want our database to be hosted on: AWS, Google Cloud Platform, or Microsoft Azure. Within the cloud provider, we also need to choose a region:

As discussed in the Latency background section, we want to pick the provider and region closest to our Heroku GraphQL server so that our GraphQL server can reach the database quickly.
Here are all the Heroku regions:
$ heroku regions
ID         Location                 Runtime
─────────  ───────────────────────  ──────────────
eu         Europe                   Common Runtime
us         United States            Common Runtime
dublin     Dublin, Ireland          Private Spaces
frankfurt  Frankfurt, Germany       Private Spaces
oregon     Oregon, United States    Private Spaces
sydney     Sydney, Australia        Private Spaces
tokyo      Tokyo, Japan             Private Spaces
virginia   Virginia, United States  Private Spaces
Our server is in the default region, us. We can look up more information about us using Heroku’s API:
$ curl -n -X GET https://api.heroku.com/regions/us -H "Accept: application/vnd.heroku+json; version=3"
{
  "country":"United States",
  "created_at":"2012-11-21T20:44:16Z",
  "description":"United States",
  "id":"59accabd-516d-4f0e-83e6-6e3757701145",
  "locale":"Virginia",
  "name":"us",
  "private_capable":false,
  "provider":{
    "name":"amazon-web-services",
    "region":"us-east-1"
  },
  "updated_at":"2016-08-09T22:03:28Z"
}
Under the provider attribute, we can see that the Heroku us region is hosted on AWS’s us-east-1 region. So let’s pick AWS and us-east-1 for our Atlas database hosting location. Now it will take less than a millisecond for our GraphQL server to talk to our database.
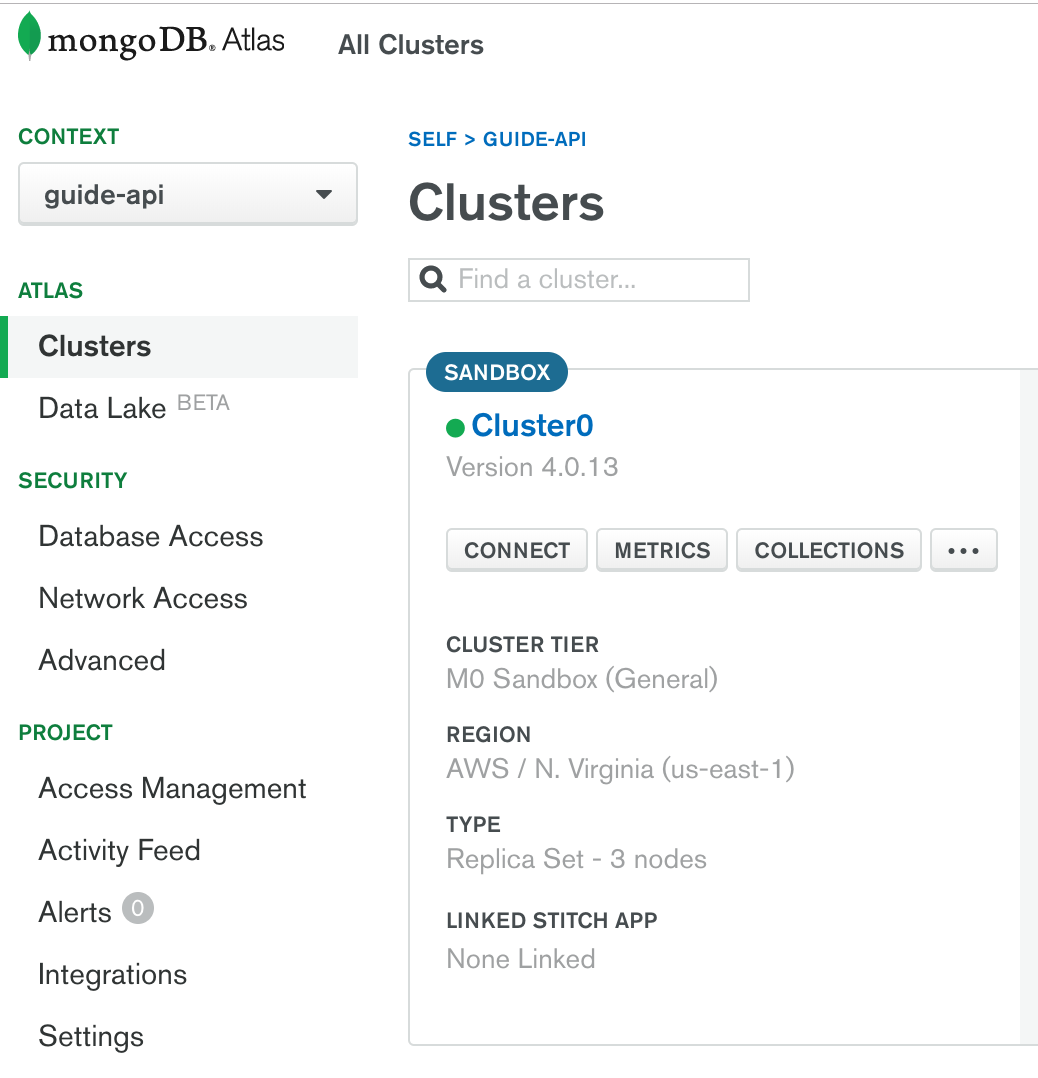
After a few minutes, our cluster has been created, and we can click the “Connect” button:

The first step is “Whitelist your connection IP address.” IP safelisting (formerly known as “whitelisting”) only allows certain IP addresses to connect to the database. The IP address we want to be able to connect to the database is the IP of our GraphQL server. However, our Heroku dynos have different IPs, and the IPs of us-east-1 change over time. And, even if they were static, it wouldn’t be very secure to list them, as an attacker could rent a machine in us-east-1 to run their code on. As an alternative, we could use a Heroku add-on to provide a static outbound IP address for all of our dynos, but, for now let’s go the easy and less secure route of safelisting all IP addresses. Use 0.0.0.0/0 to denote the range of all addresses.
This issue isn’t specific to Heroku or MongoDB—it applies to any database that’s used by any server platform with shared IP addresses.
Next we’ll create a username and password. On the “Choose a connection method” step, we choose “Connect your application” and copy the connection string, which looks like this:
mongodb+srv://<username>:<password>@cluster0-9ofk6.mongodb.net/test?retryWrites=true&w=majorityThe cluster0-*****.mongodb.net domain is the domain of our new MongoDB cluster, which can contain multiple databases. The /test? part determines the default database. Let’s change ours to /guide?. We also need to replace <username> and <password> with the user we created.
Then we can set our URL as an environment variable:
$ heroku config:set MONGO_URL="mongodb+srv://***:***@cluster0-*****.mongodb.net/guide?retryWrites=true&w=majority"And finally, we can reference it in the code:
const URL = process.env.MONGO_URL || 'mongodb://localhost:27017/guide'At this point, our new database is empty. We can either recreate our user document using Compass or run this command to copy all our users and reviews from our local database to the production database:
mongodump --archive --uri "mongodb://localhost:27017/guide" | mongorestore --archive --uri "mongodb+srv://..."
Replace
mongodb+srv://...with your URL.
After we commit and push to Heroku, we can see our server is error-free! 💃
$ heroku logs
heroku[web.1]: Starting process with command `npm start`
app[web.1]:
app[web.1]: > [email protected] start /app
app[web.1]: > node dist/index.js
app[web.1]:
app[web.1]: GraphQL server running at http://localhost:33029/
heroku[web.1]: State changed from starting to up
Redis hosting
Background: Redis
If you’re jumping in here,
git checkout 27_0.2.0(tag 27_0.2.0, or compare 27...28)
There are two parts of our app that are only meant to run in development, and we need to change for production:
- Apollo Server’s included
PubSubimplementation, which we use for subscriptions. - Apollo Server’s default cache, which is used by data sources.
Both of these things were designed to work when the server runs as a single continuous process. In production, there are usually multiple processes/containers/servers, PaaS containers are subject to being restarted, and FaaS definitely isn’t continuous 😄.
To get ready for production, let’s use a PubSub implementation and cache library that were designed for Redis, the most popular caching (in-memory) database.
Redis PubSub
Our current PubSub comes from apollo-server:
import { PubSub } from 'apollo-server'

export const pubsub = new PubSub()
There are many PubSub implementations for different databases and queues (see Apollo docs > Subscriptions > PubSub Implementations). We’ll use RedisPubSub from graphql-redis-subscriptions when we’re in production:
import { PubSub } from 'apollo-server'
import { RedisPubSub } from 'graphql-redis-subscriptions'

import { getRedisClient } from './redis'

const inProduction = process.env.NODE_ENV === 'production'

const productionPubSub = () => new RedisPubSub({
  publisher: getRedisClient(),
  subscriber: getRedisClient()
})

export const pubsub = inProduction ? productionPubSub() : new PubSub()
We have the same line checking NODE_ENV in formatError.js, so let’s deduplicate by adding a new file:
export const inProduction = process.env.NODE_ENV === 'production'import { inProduction } from './env'import { inProduction } from '../env'The one piece we haven’t seen yet is getRedisClient:
import Redis from 'ioredis'

const { REDIS_HOST, REDIS_PORT, REDIS_PASSWORD } = process.env

const options = {
  host: REDIS_HOST,
  port: REDIS_PORT,
  password: REDIS_PASSWORD,
  retryStrategy: times => Math.min(times * 50, 1000)
}

export const getRedisClient = () => new Redis(options)
We use our preferred Redis client library, ioredis. The retryStrategy function returns how long to wait (in milliseconds) before trying to reconnect to the server when the connection is broken.
We need a public Redis server to connect to. For that, we’ll use Redis Labs, the sponsor of Redis. They have a DBaaS, and it includes a free 30MB tier we can use. During sign-up, we have to choose a cloud provider and region (we’ll use AWS and us-east-1, since that’s where our GraphQL server is hosted), as well as an eviction policy: allkeys-lfu. An eviction policy determines which keys get deleted when the 30MB of memory is full, and lfu stands for least frequently used.
Once we’ve signed up, we’ll have connection info like this:
.env
REDIS_HOST=redis-10042.c12.us-east-1-4.ec2.cloud.redislabs.com
REDIS_PORT=10042
REDIS_PASSWORD=abracadabra
Once the info is added to our .env file, our getRedisClient() function (and our pubsub system) should start working.
We can check to make sure it’s connecting to the right Redis server by turning on debug output: in the
devscript in ourpackage.json, addDEBUG=ioredis:*beforebabel-node src/index.js.
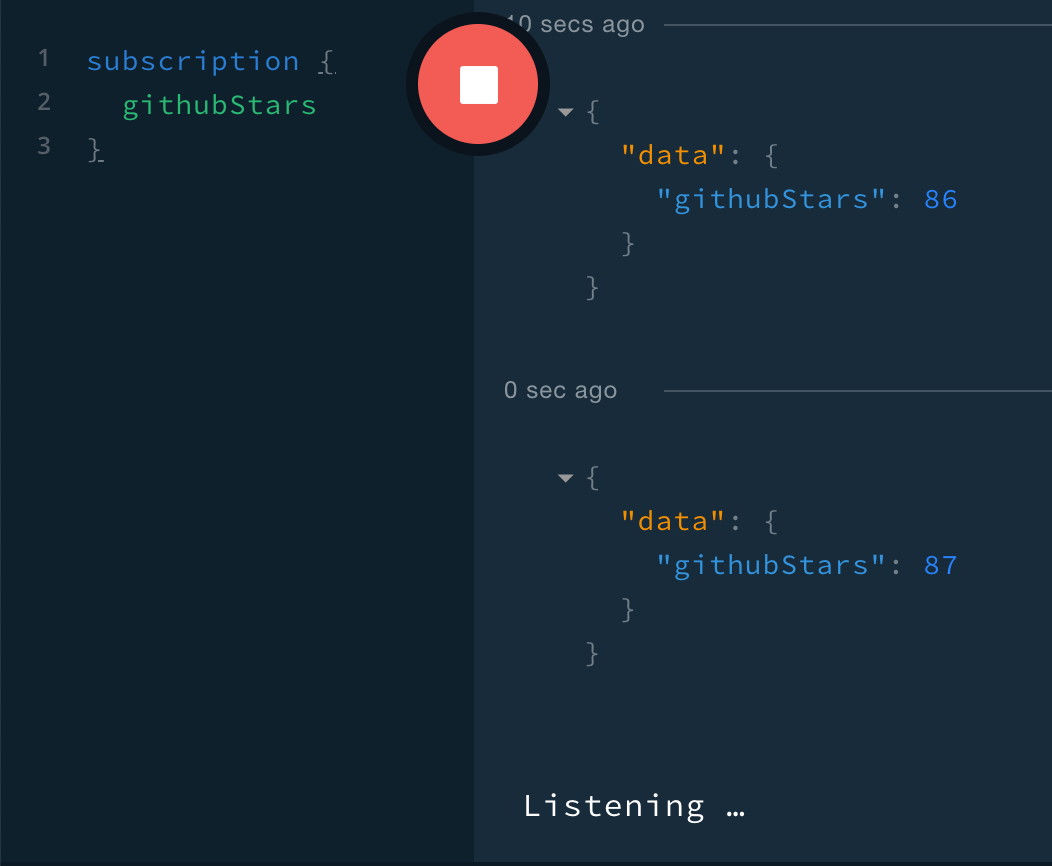
We can also test our new Redis-backed pubsub by making a subscription in Playground, unstarring and starring the repo on GitHub, and confirming that two events appear:

Redis caching
Apollo Server’s default cache for data sources is an in-memory LRU cache (LRU means that when the cache is full, the least recently used data gets evicted). To ensure our data source classes across multiple containers have the same cached data, we’ll switch to a Redis cache. The 'apollo-server-cache-redis' library provides RedisCache:
import Redis from 'ioredis'
import { RedisCache } from 'apollo-server-cache-redis'

const { REDIS_HOST, REDIS_PORT, REDIS_PASSWORD } = process.env

const options = {
  host: REDIS_HOST,
  port: REDIS_PORT,
  password: REDIS_PASSWORD,
  retryStrategy: times => Math.min(times * 50, 1000)
}

export const getRedisClient = () => new Redis(options)

export const cache = new RedisCache(options)

export const USER_TTL = { ttl: 60 * 60 } // hour
We added the cache and USER_TTL exports. Now we can add cache to the ApolloServer constructor:
import { cache } from './util/redis'

const server = new ApolloServer({
  typeDefs,
  resolvers,
  dataSources,
  context,
  formatError,
  cache
})
To use caching, we have to set a TTL (time to live) with our calls to findOneById. This argument denotes how many seconds an object will be kept in the cache, during which calls to findOneById with the same ID will return the cached object instead of querying the database.
We choose a TTL based on our app requirements and how often our objects change. Our user documents rarely change, and it wouldn’t be a big deal for one to be less than an hour out of date after a change, so we can set the TTL for user documents to an hour (60 * 60 seconds). We’re not currently using findOneById for reviews, but if we did, we might use a lower TTL—maybe a minute—if we want users to be able to edit their reviews and see those changes reflected in the app sooner.
Now let’s add USER_TTL to our User and Review resolvers:
import { USER_TTL } from '../util/redis'

export default {
  Query: {
    me: ...
    user: (_, { id }, { dataSources }) => {
      try {
        return dataSources.users.findOneById(ObjectId(id), USER_TTL)
      } catch (error) {
        if (error.message === OBJECT_ID_ERROR) {
          throw new InputError({ id: 'not a valid Mongo ObjectId' })
        } else {
          throw error
        }
      }
    },
    searchUsers: ...
  },
  ...
}import { USER_TTL } from '../util/redis'
export default {
Query: {
reviews: ...
},
Review: {
id: ...
author: (review, _, { dataSources }) =>
dataSources.users.findOneById(review.authorId, USER_TTL),
fullReview: async (review, _, { dataSources }) => {
const author = await dataSources.users.findOneById(
review.authorId,
USER_TTL
)
return `${author.firstName} ${author.lastName} gave ${review.stars} stars, saying: "${review.text}"`
},
createdAt: ...
},
...
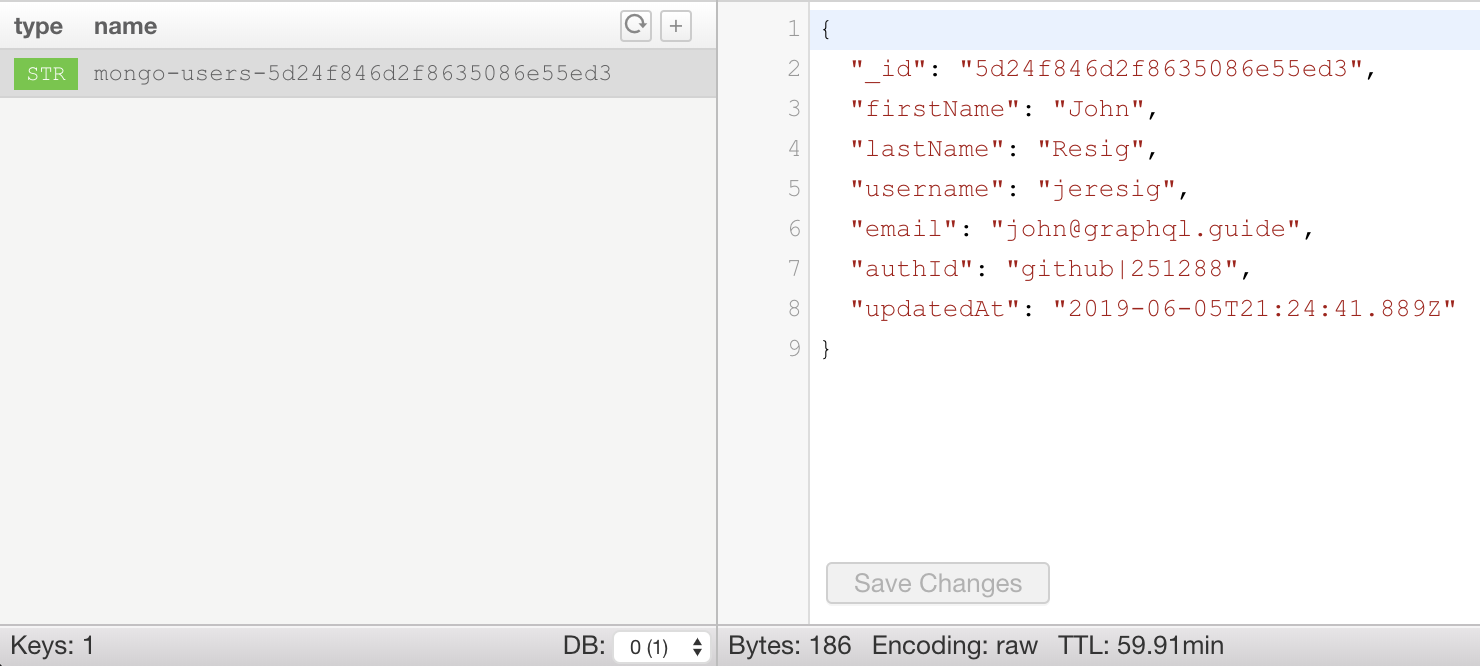
}Now after we make a query like { reviews { fullReview } }, we should be able to see a user object stored in Redis. To view the database’s contents, we can use the command line (brew install redis and then redis-cli -h) or a GUI like Medis:

The cache key has the format mongo-[collection]-[id], and the value is a string, formatted by Medis as JSON. We can also see the remaining TTL on the bottom right.
Finally, let’s get Redis working in production. We update our environment variables on Heroku with:
$ heroku config:set \
REDIS_HOST=redis-10042.c12.us-east-1-4.ec2.cloud.redislabs.com \
REDIS_PORT=10042 \
REDIS_PASSWORD=abracadabra
And we push the latest code:
$ git commit -am 'Add Redis pubsub and caching'
$ git push heroku 27:master
We’ll learn in the next section how to query our production API. For now, we can test our Redis in production by deleting the mongo-users-foo key, making the same { reviews { fullReview } } query, and then refreshing Medis to ensure the key has been recreated.